
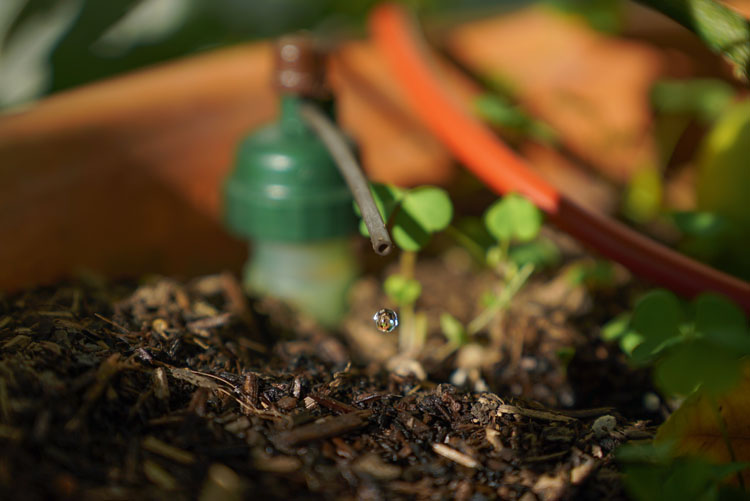
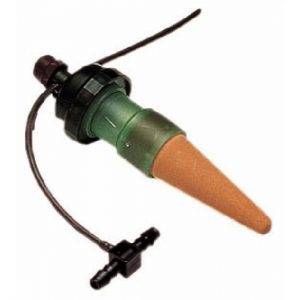
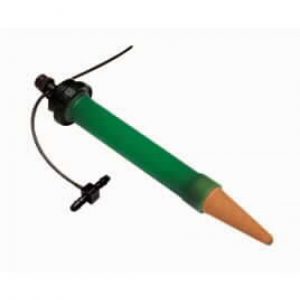
Tropf Blumat sensors, also affectionately referred to as “Blumats” and “Carrots,” are the ultimate irrigation tool, and the epitome of drip irrigation technology.
Tropf is German for “drip” (Blumat products are engineered and manufactured in Austria), and distinguishes these Blumat sensors from the Blumat Classics and Blumat Bottle Adapters.
While Blumat classics and bottle adapters have a constant flow rate, the flow rate emitted by Tropf Blumat Sensors is variable (based on plant demand) and adjustable (based on user desires and discretion).
How Do they Work?
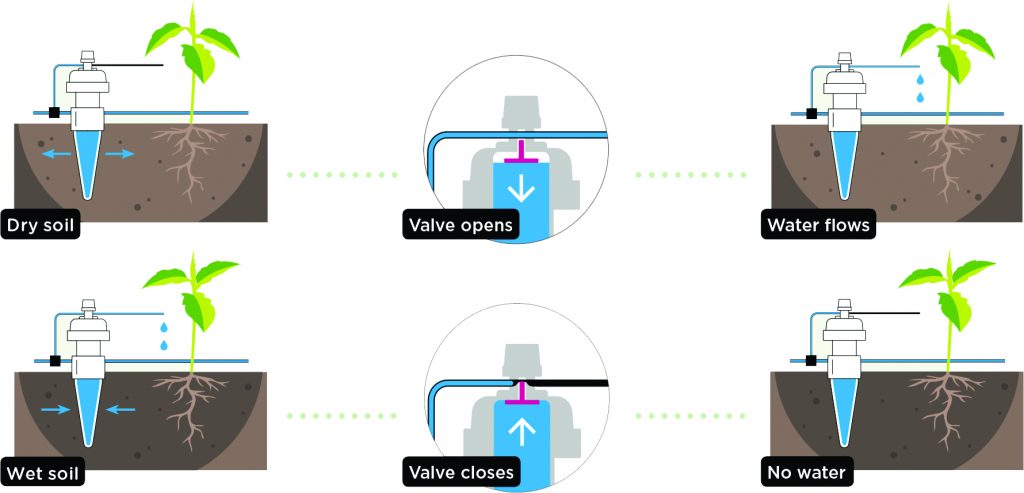
Each Tropf Blumat is filled with water and voided of air prior to being connected to a pressurized line (pressure from gravity-feed is adequate). Contrary to popular belief, the water inside the Blumat is never emitted to water the plant. This water is used ONLY to regulate the valve in the top of the Blumat.
The water inside the Blumat is in a completely sealed environment. The only exposure it has is through the pores in the ceramic cone. As soil surrounding the cone dries, it pulls on the moisture inside the cone through osmotic pressure. Since this is a sealed environment and the pressure cannot equalize, this pulls on a plastic diaphragm in the top of the Blumat. When the diaphragm is pulled down, it allows an irrigation tube running through the top of the valve of the Blumat to open and emit moisture. It does this very gradually.
As the water is emitted through the Blumat, the moisture is gradually restored to the soil surrounding the porous ceramic. This relieves the pressure difference between the chamber inside the Blumat and the surrounding soil. This stops pulling on the diaphragm, and the diaphragm restores its former position of pinching the irrigation tubing shut.
The brown knob on top of each Tropf Blumat can be invidually calibrated to specific plant species, strain/cultivar/varietal, or media. Thus, a gardener could have two species in two different containers with two completely different water needs. They could connect both of those plants to the same Blumat system (but each with their own carrot), and each plant could be ideally irrigated.
There is really no irrigation device like it!
Installation Instructions
- Water your garden thoroughly ( ideally over-night) before installation.
- Prep the Carrots
a) Fill a container with cooled, non-aerated water (if you’re not sure, boil & cool the water first).
b) Separate the ceramic bottoms from the plastic tops, and soak both parts for at least 15 minutes (overnight is best).
c) While holding the green top underwater (they’ll tend to float), use pipette/eye dropper/your thumb to squirt water into the holes in the green cap. You want to displace any small air bubbles stuck in the cap.
d) Hold both cap and ceramic bottom underwater. Confirm the ceramic bottom and cap are both completely void of air, and reassemble the Blumat ceramic bottom with the green cap while both components are still underwater).
c) Soak the assembled Blumat sensors and keep them submerged until you’re ready to use them. Blumat sensors can stay in water indefinitely, but avoid algae growth and light exposure. - Start by connecting the 8mm tubing to a reservoir or Blumat Pressure Reducer which has been integrated to a pressurized line.
- Run the 8mm tubing to your plants.
- Water the garden again, and push the Blumat Carrot in where you would like the moisture sensed. Cut the 8mm tubing and insert the 8 x 8 x 3mm tee (included with each Blumat). Slide or push the 8mm tubing over the 8mm barbs on the tee. This supplies water to the Blumat Carrot.
- For the last carrot, use the elbow insert instead of the tee. Alternatively, keep the tee in place. Use a small amount of 8mm tubing to attach a 8mm shut-off valve following your final Blumat carrot. This will function as an air/debris purge valve.
- Turn on the water supply and adjust the flow to each Blumat:
a) Open the valve on the Blumat until flow is visible. Keeping the 3mm tubing level with the valve of the Blumat, slowly tighten (turn clockwise) the Blumat until a hanging drop is just achieved. The flow should just be stopped, but do not twist beyond that point for the “hanging drop.”
b) Tighten the valve on the Blumat an additional two triangles. This will roughly calibrate the sensor to keep maintain current moisture levels.*
c) Come back in 12-24 hours, and make adjustments to each Blumat. If a container or area is over-watered, tighten the Blumat valve (turn clockwise). If a container or area is under-watered, open the Blumat valve (turn counter-clockwise).
d) Repeat the previous step until your system is exactly where you’d like it. The Blumat Digital Moisture Meter is a great tool for assisting with this step.
*If using BluSoak drip tape, do not follow this step. Keeping your sensors at the hanging drip is ideal.
Integrating Blumat Sensors to Blumat Watering Systems
Blumat Sensors are the central components of Blumat Watering Systems, which are pioneered by Sustainable Village.
Blumat Watering Systems use Blumat Sensors in combination with traditional Drip System technology to achieve the ideal combination of efficacy, economy, and practicality in an irrigation system.
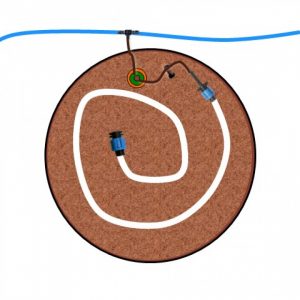
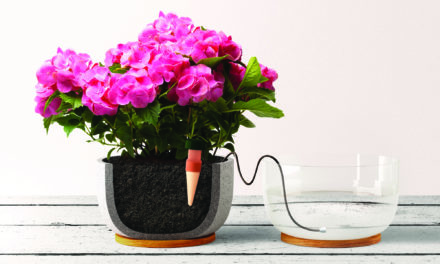
Blumat Sensors can be used as standalone devices, shown in the first graphic in this article. However, they can also be integrated with drip emitters (we call them “distribution drippers”), drip tape (we use a product called BluSoak), or capillary mats. Depending on container size,
These three components assist Blumat sensors in going further. While a Blumat typically irrigates a very small area (a 1-gallon container for example), a single Blumat can irrigate entire garden beds.
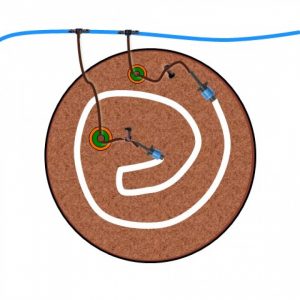
The drippers can be arranged in a straight line, in a circular coil, a zig-zag pattern, or anything else one could imagine.
Integration with Distribution Drippers
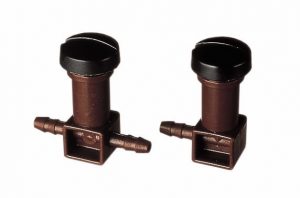
Distribution drippers extend the watering ability of each Blumat. Each Dripper adds a point of emission to a container or garden area. There are in-line drippers, which have 3mm openings on both sides, and end-drippers, which have a single 3mm inlet. These are intended to end a string of drippers.
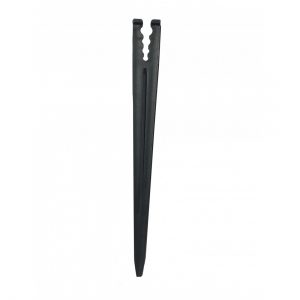
Distribution drippers are the easiest-clogging component of a Blumat system. We recommend using Universal Stakes to suspend the dripper above the surface of the growing media to minimize debris and other clogging risks.
Gravity
On a gravity-feed, we do not recommend using more than 3-5 distribution drippers following each sensor. The distribution drippers are integrated in-line using 3mm tubing following a sensor.
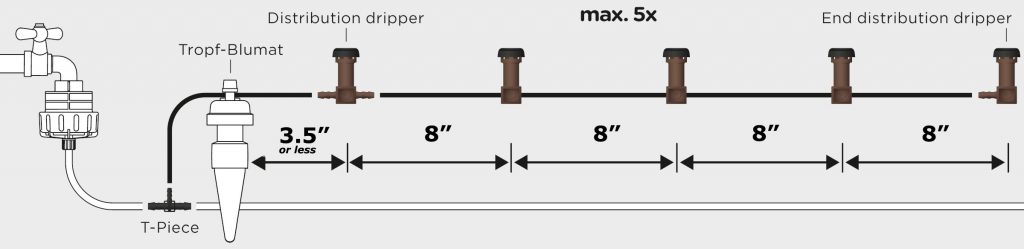
Each dripper can be placed up to 8″ apart from the previous dripper. The first should be within about 4″ of the Blumat sensor–this will inform the Blumat more quickly of accurate moisture levels in the soil.
The distribution drippers can also be individually adjusted. Some SV staff members recommend this, while others do not. I personally like to open up the final drippers in the series by more turns than the first ones, and find I get more even emission rates. Opening the further drippers helps to compensate for pressure drop-off in my experience.
Pressure
Integrating drippers in a pressure system is the same as gravity, but more drippers can be used effectively. While it is certainly not best practices, I’ve spoken with customers who report using up to 30 distribution drippers following a Blumat with great success in pressurized systems. These arrangements certainly take some ingenuity and fine-tuning from the gardener, but it can be done!
The particular customer I talked to was irrigating 30 different plants this way. They had the Blumat sensor in the first container and used this container as an “indicator” plant for the other 29 plants. Each plant/container had its own dripper. This type of arrangement definitely runs risks of over or under-watering any of the 29 plants, but is certainly an economical design.
Adjusting drippers is NOT recommended in a pressurized system.
Integration with BluSoak Drip Tape
BluSoak drip tape extends the watering ability of each Blumat sensor. It can be cut to any length (although we don’t recommend a Blumat feeding into more than 30′ of a single length of tape), arranged in “W” patterns (for garden beds), circular or concentric coils (for trees and round pots), or straight lengths (for row crops).
The tape should always be on a level surface. Lengths of tape need to be on a 0-1% grade slope, or they will distribute and emit unevenly.
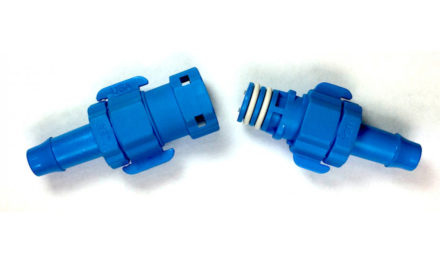
To integrate the tape with a Blumat sensor, all that is necessary is the 3mm tubing included with each Blumat, and a 3mm x Tape Adapter:
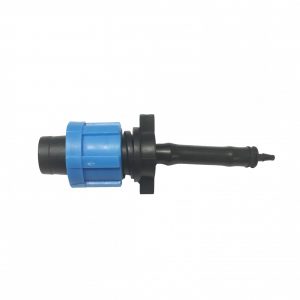
This makes integrating BluSoak to Blumat systems extremely user-friendly and versatile.
In economy designs, the end of the tape length is concluded with an end flush plug:
In mid-range designs, we sandwich a length of tape between two Blumat sensors. We generally use one 5″ Blumat, and one 9″ Maxi Blumat:
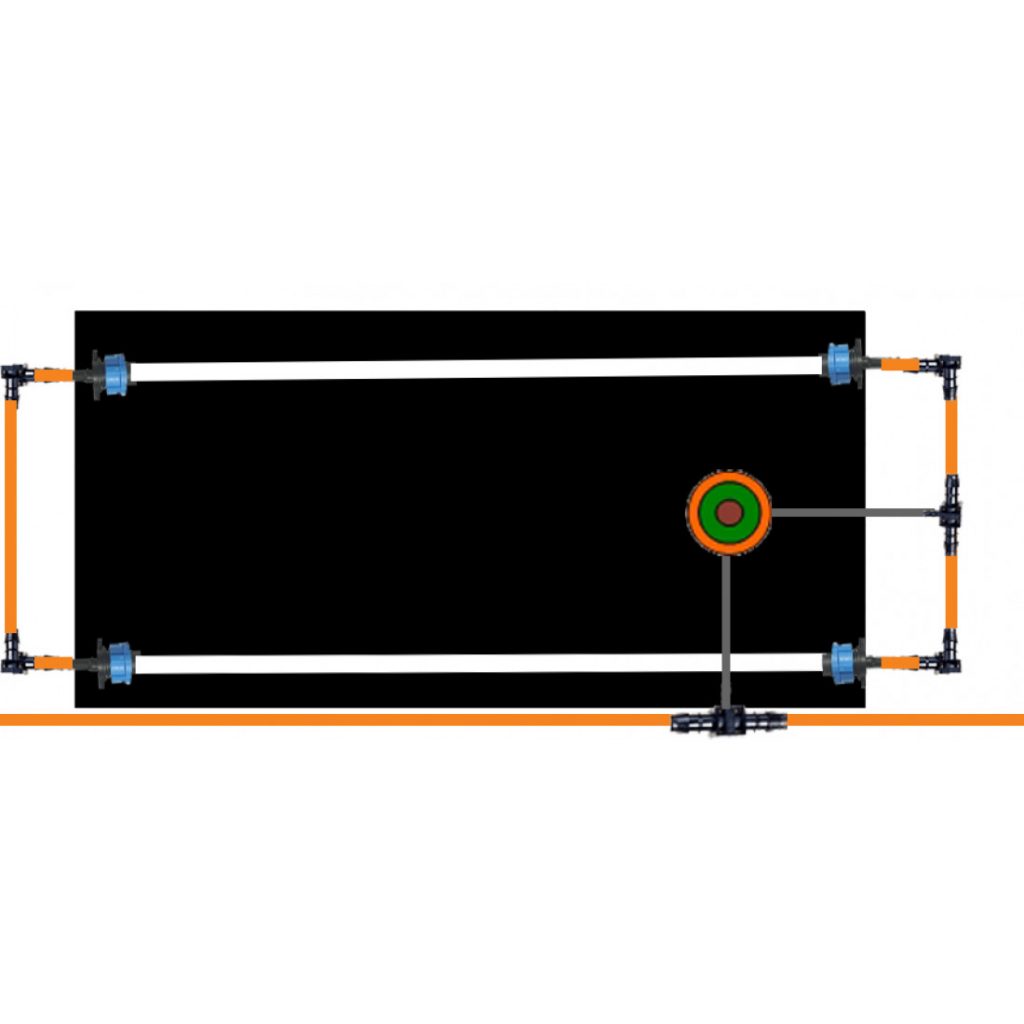
Deluxe BluSoak designs are generally the double-manifold configuration for garden or raised beds:
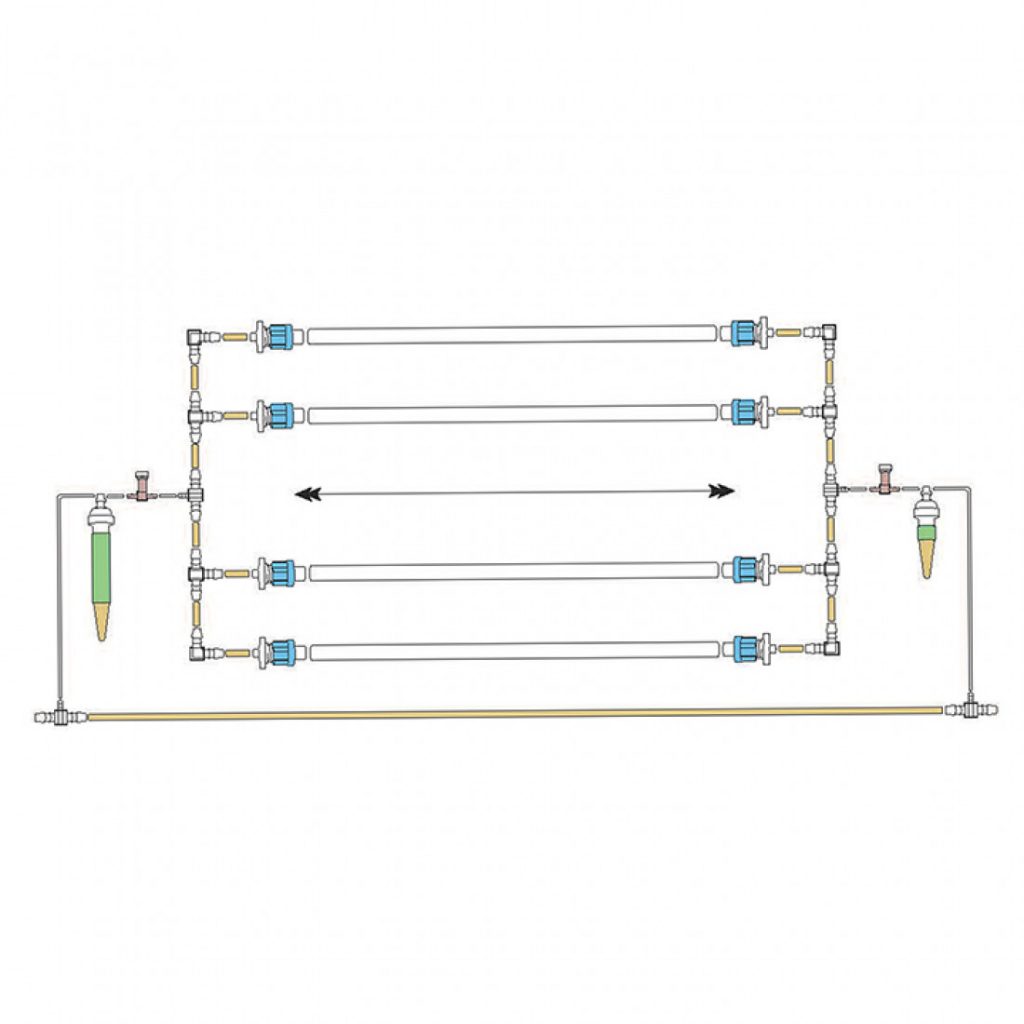
These designs feature the two Blumat sensors, each feeding into a manifold of drip tape. The parts included to construct each manifold include 8mm super-flex tubing and 8mm Blumat components. The number of tape-lengths in each manifold is dependent on the width of the bed. For each foot of width, it’s recommended to have a length of tape. For example, a 2-foot-wide bed should have two lengths of tape in the manifold. A 4-foot-wide bed would have four lengths (pictured above), up to a 6-foot wide manifold.
The maximum recommended length for each manifold is 20′. Thus, the largest recommended area to be irrigated using a single double-manifold kit would be 6′ x 20′–a full 120 square feet of garden or raised bed, using only two Blumat sensors.
The reader will also notice that a distribution dripper is shown in each of the designs above. These are not necessary, but they are recommended with Blumat systems and are included with each BluSoak kit.
Gravity
BluSoak tape can work in gravity-fed systems, but it is not ideally suited for it. Gravity-fed systems do not produce much pressure in the irrigation tubing. BluSoak drip tape functions best in the ballpark of 4PSi. In a gravity system, this would mean the water line of your reservoir is about 10′ higher than your soil surface! Obviously in indoor systems (and many outdoor), this is a problem.
When the reservoir is lower than that, the tape will fill with water. However, it becomes possible for the demand of your plants to exceed the maximum flow rate of the tape. This is not a problem in pressurized systems, and your system can always meet plant demand.
Pressure
Pressurized systems work ideally with Blumat and BluSoak–no caveats here, except to use a Blumat Pressure Reducer prior to entering your system. Many folks try to skimp and use cheaper pressure reducers, which require minimum flow rates (which are not met by the slow, gradual flow rates from Blumat systems), and end up destroying their tape. Excessive incoming pressure will burst your tape!
Integration with Capillary Mats
A flat-bottomed Surface Blumat is used to regulate moisture levels on a Capillary Mat, using the same technology as the cone-shaped Tropf:
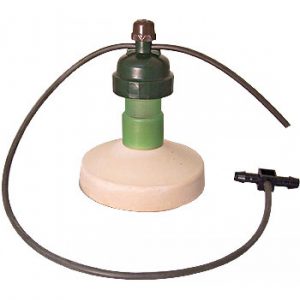
The flat bottom of the cone is put into contact with the wicking, capillary-acting material in a mat configuration, like below:
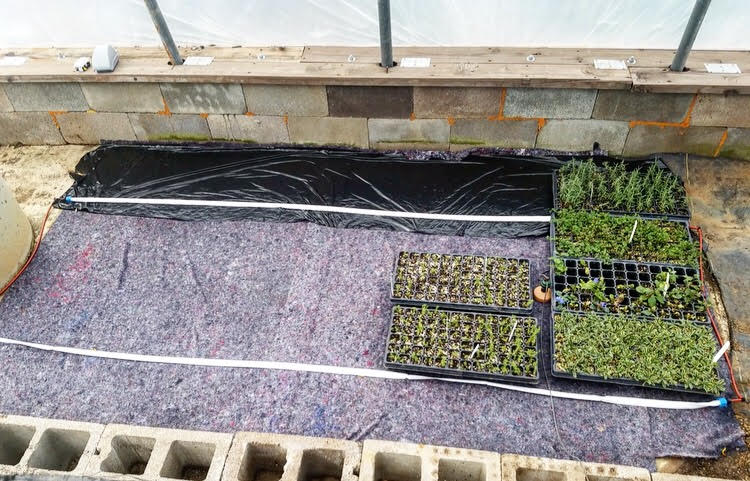
In this configuration, the Surface blumat feeds into a two row-manifold of BluSoak drip tape. A Surface Blumat is integrated to a water supply line the same as any Blumat, and then feeds into the manifold. The concept can be viewed below:
Capillary mat systems are ideal for smaller plants, mother plants, starts, and seedlings. They offer a low maintenance, low labor, high performance irrigation system for a large amount of square footage. It is recommended to use containers 5 gallons or smaller with the capillary mats at Sustainable Village. It’s also recommended that they be made of fabric, or plastic (with flat bottoms) and holes 1/8″ or larger in the bottoms.
Gravity
BluCap Systems can be used under a gravity feed, but it carries the same caveat as BluSoak systems under gravity feeds. Pressure is the limiting factor for emission rates. The best performing gravity-fed BluCap systems I have seen have significant elevation–the reservoir was placed in the rafters of a garage, and so the water line was about 10-12′ higher than the surface of the mat.
Pressure
BluCap systems work ideally under pressurized systems–just use a Blumat pressure reducer!
Maintenance of Tropf Blumat Sensors
The sensors should not need to be maintained while the system is operating, once the system has been dialed-in. Once a Blumat Watering System is initially calibrated and follow-up adjustments are made, it really shouldn’t need much maintenance. Outdoor systems should be monitored more closely/more often, as they have a higher likelihood of environmental changes.
I’ve seen insects, birds, and rodents chew into the 3mm tubing as well as into the BluSoak tape. This damage usually just needs a quick repair–however, it can cause flooding if it’s not properly and promptly addressed!
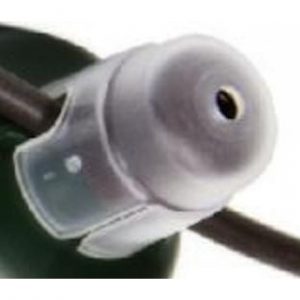
I do recommend these caps for Blumat sensors in outdoor systems, as they prevent inadvertent adjustments to each sensor and help reduce maintenance:
Once the system is installed, the only necessary maintenance is making sure it’s functioning as it has been! It’s also suggested to include air/debris purge valves when designing water supply lines. These should be opened to purge any accumulated oxygen/dissolved gases about once every two weeks.
For troubleshooting your Blumat System, I’d suggest the Tips and Tricks Guide.

